Showing posts with label recipe. Show all posts

Monday, August 18, 2008

Whip it Up - Week #7: Smoky Shrimp and Parmsean-Polenta Cakes

So normally when I get Cooking Light, I always find a few recipes I want to try. This month wasn't such a hot month for recipes. A lot of the magazine had Asian dishes that require a sauce or sauces that I don't use all that frequently. I would buy them if I knew for sure I would like the recipe and make it again, but I don't always like to take that kind of risk. Also, J doesn't LOVE Asian food, unless its sushi, so I am especially hesitant to try something new on him.

So in this month's issue (The Sept. '08 issue) I found Smoky Shrimp and Parmesan-Polenta Cakes. There is no link to the recipe b/c apparently they don't post new recipes in the year they were printed - hmm...interesting. After looking over the ingredients I realized I actually had everything (don't ask about why we had a tube of polenta. Just know it involves J and grocery shopping - enough said.) Also it seemed like things we like - shrimp, polenta, fresh herbs...so we were good to go. J and I had each done over a half hour on the Wii fit and we were hungry.

So here is the recipe (good thing its not long b/c I have to type it all in myself - ugh!)

Ingredients


1 T olive oil
1 lb. peeled and deveined medium shrimp
1/4 C dry white wine
1 T chopped fresh chives
1 T fresh lemon juice
1/4 t Spanish smoked paprika (we just used regular paprika)
1 17-oz. tube polenta, cut into 8 (1/2 inch) slices
cooking spray
8 teaspoons marinara sauce
8 teaspoons grated fresh Parmesan cheese
1 T chopped fresh flat-leaf parsley

Here's what you do:
  1. Preheat broiler
  2. Heat oil in a large skillet over medium-high heat. Add shrimp to pan; saute 3 minutes or until done, stirring frequently. Remove from heat; stir in wine, chives, juice, and paprika, tossing to coat. Keep warm.
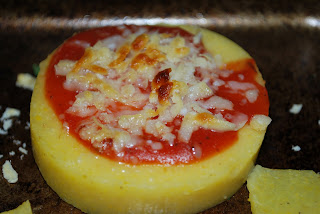
  3. Place polenta slices on baking sheet coated with cooking spray. Top each slice with 1 teaspoon sauce and 1 teaspoon cheese; broil 3 minutes or until cheese melts. Place 2 polenta slices on each of 4 plates, top each serving evenly with shrimp mixture. Sprinkle with parsley.
Yield: 4 servings

Question time:
Was the recipe easy to follow? It was only 3 steps. How hard could it be? Well, I almost messed up the shrimp and white wine step. At first I thought I had to add the wine, chives and paprika to the pan, but then I read on and realized I should just add it to the removed shrimp. Ok, problem solved.

Did the dish taste good? As J said, it wasn't memorable. I think that pouring the wine and paprika sauce that was leftover onto the shrimp and polenta was overkill. I also could have done without the marinara sauce (although without either it might have been dry).

Would you ever make it again? I may try it again just to try to improve upon it, but with so many good recipes and so many new ones to try, why waste the time.

Try it and let me know how it turns out.....

Monday, August 11, 2008

Whip it Up - Week #6: Pioneer Woman's Crispy Yogurt Chicken

So I love the cooking, pictures and recipes that the Pioneer Woman makes. Her food always makes me drool. So today I had no plan for dinner and the recipe for Crispy Yogurt Chicken looked good and I was up to finally try one of her recipes. I think driving by all the farms this weekend in KY and TN made me think of her and her life and how I can't believe she left the life of a city for the life of a farm...but that's another post.

So I didn't take pictures of my process in making this because Ree just did and her pics are way better than any I could ever put on this site (at least now) and I will let you go see her pics there. If you did not see this recipe originally or you haven't ever gone over to the Pioneer Woman, I strongly suggest you do - its so much fun to see how someone lives such a totally different life.

So here is her recipe - I edited out some of her comments but left some of them in. I added in some of my own, those are in blue.

Ingredients:

Chicken (I used legs, but any piece of chicken will do), Plain, Unflavored Yogurt, Garlic, Parsley, Lemon Juice, Salt, Butter, and Panko Bread Crumbs.

  • Begin by throwing 2 cups of plain yogurt into a mixing bowl.
  • Now peel a couple of cloves of garlic. And mince them very finely.
  • Now throw the garlic in with the yogurt. Now grab some parsley. It gives a nice, fresh flavor to the chicken.
  • Chop the parsley finely. Then throw it into the yogurt. Give the mixture a little stir.
  • Now cut a lemon in half. Then squeeze in the juice, stirring well to combine. My lemon was very juicy - we'll see if that effects the taste at all
  • Now go thoroughly rinse the chicken, and salt it well.
  • Pour some Panko breadcrumbs into a second bowl. I start with about 2 cups.
  • Salt the breadcrumbs just to give them a little more flavor.
  • Now, in final preparation for our landing, go ahead and butter a baking dish. First, place the chicken, one at a time, into the yogurt mixture. Turn it over to thoroughly coat. Then roll in the Panko breadcrumbs. They’ll adhere really well—just make sure to coat all the areas of the chicken thoroughly.
  • Repeat until all the chicken is breaded and place in the buttered baking dish.
  • Then, place a slice of butter over the large part of the chicken. This is a very important step, as the Panko breadcrumbs tend to get pretty dry without the moisture of the butter. (I used butter spray to cut down on the calories).
  • Now cover in foil and bake at 350 degrees for 1 hour, removing foil for the last 15 minutes to allow it to get nice and golden. I actually had to bake mine for almost 1 hour 15 minutes this time, so be prepared to keep going until it’s nice and golden and sizzling. You’ll want the breading on the underside of the chicken not to be soft and mushy, so pay attention to it.
  • Serve it with a big, green salad with Homemade Ranch Dressing. I did not make the dressing. I just served it with a salad with Gorgonzola, dried cranberries, red onions, and candied rosemary walnuts from the Green Grocer at North Market - I love these things!

Question time:

Was the recipe easy to follow? Because the Pioneer Woman does such a great job taking pictures and breaking down the recipe visually, yes it was totally easy to follow. I didn't include her pictures and if you decide to make it, go to her site and follow her directions.

Did the dish taste good? It was OK, a bit soggy even though I cooked it for well over an hour. I think I used too much yogurt.

Would you ever make it again? Probably not, but I'm glad I tried it. I have it for leftovers tomorrow if I want to eat it again.

Wednesday, July 30, 2008

Whip it up: Week 4 - Seared Scallops with Fresh Linguine and Romano Cheese

I can't believe that this cooking challenge is half over. So I really looked for a vegetarian recipe this week. I only planned for tonight and tomorrow and vegetarian just didn't seem to fit with either of these meals. I was looking through this month's Cooking Light and in my favorite section - 20 minute meals, I found this. For the record, the past is good enough to eat on its own, so you could totally make this as a vegetarian recipe and thus it could fit with this week's theme. Sorry there aren't more pictures, J mostly cooked this and I decided as it was coming to the table that it would be good enough to blog about so that's when I decided to take the first picture.

Here is the recipe.

Seared Scallops with Fresh Linguine and Romano Cheese

The key to obtaining the perfect sear on the scallops is to cook them in a very hot pan. Fresh linguine has a silky texture that provides a nice contrast to the browned crust on the scallops. Add mixed greens tossed with a balsamic vinaigrette.

1 (9-ounce) package refrigerated linguine
1/4 cup plus 2 tablespoons (about 1 1/2 ounces) finely grated fresh Romano cheese, divided
2 tablespoons olive oil, divided
2 tablespoons chopped fresh basil
1/2 teaspoon black pepper
1/8 teaspoon salt
1 1/2 pounds sea scallops
4 lemon wedges

1. Cook pasta according to package directions, omitting salt and fat. Drain pasta in a colander over a bowl, reserving 2 tablespoons pasta water. Combine pasta, reserved 2 tablespoons pasta water, 1/4 cup cheese, 1 tablespoon oil, chopped basil, and pepper in a large bowl; toss well.
2. Heat remaining 1 tablespoon oil in a large cast-iron skillet over high heat. Sprinkle salt evenly over scallops; add scallops to pan. Cook 1 minute on each side or until golden.
3. Place 1 cup pasta mixture on each of 4 plates; top each serving with about 3 scallops and 1 1/2 teaspoons remaining cheese. Serve with lemon wedges.


Yield: 4 servings
CALORIES 495 (23% from fat); FAT 12.5g (sat 3g,mono 5.8g,poly 1.5g); IRON 5.6mg; CHOLESTEROL 110mg; CALCIUM 177mg; CARBOHYDRATE 42.4g; SODIUM 872mg; PROTEIN 51.7g; FIBER 1.9g

Cooking Light, AUGUST 2008

Question time:

Was the recipe easy to follow? Very - I love Cooking Light recipes. Except for those that ask for ingredients that are super specialized or hard to find, they are very accurate and easy to follow.

Did the dish taste good? Excellent. I love scallops and we get some great fresh linguine from the North Market so its almost impossible to mess up unless you over cook the pasta - which I didn't.

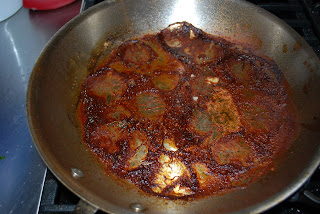
Would you ever make it again? For sure - easy, tastes good, fast, and uses little dishes - always a repeat performer in my book. I would just want to do something to avoid the pan looking like this after I seared the scallops :)

Friday, July 25, 2008

Whip It Up Week #3: Chocolate Brownie Cookies

So I thought since this week's theme was old favorites I would try a new spin on an old favorite. My parents had to make Chocolate Brownie Cookies for their gourmet club dinner on Saturday night so I thought I could help out and make these cookies for them. It being a new spin on an old favorite - brownies.

I am not sure where the recipe came from, I just know that it is from their gourmet club which gets their recipes from various sources depending on the theme for the dinner.
So here it is:
Chocolate Brownie Cookies
Makes 5 dozen cookies (no way - it only made 4 dozen and I can't imagine them being any smaller)

1/4 cup all purpose flour

1/4 teaspoon baking powder

1/8 teaspoon salt

2 large eggs

2/3 cup sugar

1/2 tablespoon brewed espresso (optional)

1 teaspoon vanilla extract

2 tablespoons unsalted butter

5 oz. extra bittersweet chocolate, chopped

2 oz. unsweetened chocolate, chopped

3/4 cup mini chocolate chips

Preheat oven to 375 degree. Lin baking sheets with parchment paper.

Whisk together flour, baking powder and salt in a small bowl.

Briefly whip eggs to break them up in an electric mixer bowl. Add the sugar, espresso, and vanilla. Beat on high speed for ten minutes, until tripled in volume.

While eggs are whipping, place the butter in the top of a double boiler or a metal bowl suspended over a pot of simmering (not boiling) water, and scatter the bittersweet and unsweetened chocolate on top. Heat until butter and chocolate melt. Remove from heat and stir the butter and chocolate until smooth.

Gently fold chocolate mixture into the egg mixture until partially combined (there should still be some streaks)

Add the flour to the batter and carefully fold in. Then fold in the chocolate ships. Let batter rest for ten minutes during which time it will thicken slightly.

Drop batter by heaping teaspoons onto the prepared baking sheets and bake until puffed and cracked, about 8 to 10 minutes (mine took the full 10). Cool on a wire rack before removing from baking sheet.

Question time:

Was the recipe easy to follow? It was relatively easy, but with double boiling and parchment paper and folding, it was a bit fussy for me.

Did the dish taste good? The cookies were very good. I'll be interested to find out if they ever get crunchy, for now they are very chewy.

Would you ever make it again? Probably not. It was just too much work - three types of chocolate, the double boiler, etc. I will stick to the boxed brownies for me next time.

Tuesday, July 15, 2008

Whip It Up: Recipe #3 (a second try at week 2) - Zucchini Pie

So I was so disappointed at the corn bread recipe I submitted for this week's Whip It Up Challenge that I decided I wanted to try again. J and I have new plan for weekly dinners. On Sunday I ask him to come up with a week's worth of meals he wants me to make and then I search for recipes on Monday and go shopping for the week. We did this to ease my stress on planning meals, varying our diets, and limiting the number of trips to the grocery store. So this week's menu was:
Today I made the zucchini pie - very easy, as most Bisquick recipes are. It also produced little dishes which makes me happy.


Here it is:

Ingredients

  • 3 cups diced zucchini
  • 4 beaten eggs (I used 1 Cup of egg beaters)
  • 1 cup Bisquick (I used the light and healthy kind)
  • 1/4 cup oil
  • 1/2 cup grating cheese (I used mild cheddar - and thus this qualifies as a cheese recipe)
  • 1 onion chopped
  • 1/2 tsp garlic powder
  • 1/2 tsp oregano
  • salt and pepper to taste

Procedure

  • mix ingredientspour into greased 9 inch pie pan bake 425 degrees for an hour

SEE HOW EASY! Gotta love it!

Recipe courtesy of my mother-in-law

Question time:
Was the recipe easy to follow? Super easy - how could I mess it up, it was only 3 steps

Did the dish taste good? It was pretty good...not amazing. It tasted better with green tabasco on it.

Would you ever make it again? We said we would although we would do some things differently. We might add a different cheese, maybe parmesean. We also would add more salt. And fnally I would consider adding some kind of meat, either bacon or ham. Just because I think the salt would be good for the meal (I also could cut out some of the oil I think if I did this).

And since I sometimes try to think about weight watchers I figured the points for 1/4 of this recipe - 8 pts - a bit high for no meat, but that's b/c of the oil.

Still looking for the recipe to match week one's awesomeness. Next week I am home in CT some there will probably some pics of dad making a recipe - does that count - you bettcha! He's a good cook who is always looking for new recipes.

Sunday, July 13, 2008

Saturday Night Date Night

So I had a lot going on on Saturday. I had to run 9 miles at 8 and then from noon to 5 I had to work at a Disc Golf Tournament to raise money for Team in Training. I told J that he was in charge of dinner on Saturday. It was to be a date night. I didn't care what we did or where we went, I just didn't want to come home and say, what do you want to do tonight and have to figure it out.

J told me mid-day he was going to Weiland's (I was a bit disappointed because I really do want to go out to a nice dinner here in CBus - we haven't been to one in awhile on a Saturday night) and then later he sent me a text that we were to be having a tasting dinner with wines. We love tasting menus so I was excited about where. When I got home I learned that J had planned a tasting menu here at the house for us. Very impressed. He bought flowers, lit candles and typed out a menu. I didn't take pictures but here was the menu:

Crisp Asparagus Salad with a Tarragon Vinaigrette Dressing
Lime-Grilled Mahi-Mahi served with Fresh Corn Fritters
Wild Mushroom Risotto
Bacon Wrapped Filet Mignon served over Bordelaise
Toasted Almond Gelato served over shavings of Bittersweet Belgium Chocolate

There was also a cheese course we didn't get to and a white wine, a red wine and a moscato that J served. Needless to say a much better than expected date night and it was kinda nice to be home....although I do still want to go to a somewhat nice dinner sometime soon....

Friday, July 11, 2008

Whip It Up: Recipe #2 - Corn Bread

So this week, J and I did a great job of planing our meals on Sunday night and then making each of the planned meals. This really helped me, because for once, I only went to the grocery store one time all week! Also, all but one day was a new recipe, so I could have used anyone for Whip It Up this week.
  • Monday we made fish tacos - J liked them more than I did
  • Tuesday we made scallops and zucchini - it was a bad day & night so nothing would have tasted good. I think J undercooked the scallops but we cooked at 9:30 at night and neither of us were in the mood!
  • Wednesday we made spicy honey-brushed chicken thighs - not for everyone but they were done in less than 10 min and SUPER easy. If I had remembered to take pictures I would have included this in Whip It Up this week
  • Thursday we made a recipe I found and made last summer - Salmon BLTs. I have no idea where it came from, but its very good! If you want it I'll send it to you.
  • Friday we made ribs - a family recipe that we got from Cook's Illustrated (except we use Penzey's Galena Street spice rub instead of the cook's illustrated one and we don't bother with the wood chips - really we just use Cook's Illustrated for the brining directions) and corn bread. J wanted to try home made corn bread. I figured doctoring a box recipe was better so I found this recipe and read the review that said this: "I have been making this for years. It is sooo easy and delicious. I was nervous about the amount of rosemary as it seemed like a lot for this strong flavored herb but it is wonderful. It goes great with ribs, chicken and turkey." Perfect I thought - J loves rosemary so no problem if its too much and its good with ribs - perfect!
Long story short - here it is ( I made half of the recipe):

Ingredients

2 8 1/2-ounce boxes corn-bread mix (I used an 8 oz bag)
2 eggs, slightly beaten
1 8-ounce container plain yogurt
2 7-ounce cans whole-kernel corn, drained
1 tablespoon dried rosemary leaves
Preparation
Heat oven to 400ºF. Lightly coat a 13-by-9-inch baking pan with cooking spray and set aside. Stir all the ingredients together.
Spoon the batter into the prepared pan. Bake 25 minutes or just until golden. Remove to a wire rack to cool. When cool, cut lengthwise into 3 strips and then crosswise into quarters. Cut each square into 2 triangles. (The corn bread can be made ahead to this point. Remove from pan, wrap in foil, and freeze for up to 3 months.) To serve, thaw and reheat in the foil in a 325ºF oven for 10 minutes or until heated through.
Time-saver: You don't have to bake from scratch. Doctor an everyday corn-bread mix to help it achieve holiday status.
Yield
24 servings

Nutritional Information
CALORIES 107(0% from fat); FAT 3g (sat 1g); CHOLESTEROL 19mg; CALCIUM 35mg; CARBOHYDRATE 17g; SODIUM 261mg; PROTEIN 3mg; FIBER 2g; IRON 1mg

Real Simple, NOVEMBER 2003

Question time:
  • Was the recipe easy to follow? Very - I always love recipes that don't require a lot of measuring or heavy equipment to make
  • Did the dish taste good? Not really, it wasn't nearly sweet enough, but we might freeze it for stuffing purposes
  • Would you ever make it again?Nope - still in search of a good corn bread recipe

Sorry I didn't follow the theme again, maybe later on in the week I'll make something with cheese....

Monday, June 30, 2008

Whip It Up: Taking Recipes on Test Drives Since 2008: Recipe #1

So today I was trying to figure our how to use what we had in the house to make dinner. I knew we had some chicken breasts in the freezer, the basil in the garden was ready to be cut/used and there were 2 tomatoes left from the weekend that needed to be eaten pronto. So I went onto chow.com and typed in these three (actually, I just put in chicken and basil) ingredients and this is the recipe that I got:

Chicken breasts w/ tomato basil and Gorgonzola & White wine sauce 2 tbs Butter
1 tbs Extra virgin olive oil
4 chicken breast steaks (skin off bone out)
salt and pepper to taste
1/4 cup dry white wine
1/4 cup Chicken Stock
1-2 tbs Cream
1 medium Shallot finely chopped
2 cloves Garlic, minced
1/2 cup basil (fine chiffonade)
2 tomatoes medium dice
1/4 cup Gorgonzola cheese


INSTRUCTIONS
1. First, melt butter in a large heavy-bottomed skillet on high heat and add the olive oil until the butter and oil are bubbling.
2. clean the chicken and season with salt and pepper. add chicken to pan and sear both sides until outside is golden brown.
3. Preheat oven to 325 degrees and transfer the chicken to a glass baking dish and bake for 25-30 min.
4. while the chicken is baking add the white wine and chicken stock to the pan to deglaze the pan while whisking the bits off of the bottom. add the cream and reduce for about 5 min.
5. one reduced add the garlic and shallots to the pan and reduce for a few more min. finish the sauce with a little butter and adjust with seasonings.
6. once the chicken is cooked through top with sauce and add the tomatoes, basil and Gorgonzola (in that order) on top. serve with bread or salad and enjoy!

We had everything but the Gorgonzola on hand, so that was a super bonus. I decided to serve this with crusty bread - definitely recommended.

Needless to say, when plated on the platter, husband's first words were "wow this looks really grown up," he went on to say, "this would be worth ordering in a restaurant...they might make this on Top Chef...this is the best meal you have ever made in this house...you should make this for guests...delicious!" and so on... We both loved this meal and I would make it again in a heartbeat. I know it doesn't look like much or anything special, but I think that is what made it so good. It was so unexpected.

So for some of the things needed in Whip It Up:

1) Was the recipe easy to follow - very! It was super easy - although I would always put preheating the oven first.

2) Did the dish taste good - it was awesome! husband said he can't imagine anyone who wouldn't like it, even really picky eaters

3) Would I make it again - tomorrow if I could

On a side note...modifications....the pan was too hot when I went to deglaze it so I lost a lot of liquid. I also did this to early so I had to put the pan off the heat and reheated it closer to when the chicken was actually ready (my chcken took 35 min but I don't think it was defrosted all the way yet). Because of this I added a splash more wine and chicken stock. I still would have loved even more sauce b/c it rocked. Another one was that I didn't measure my Gorgonzola or basil when adding it to the top. It just made it look pretty and taste even yummier. Husband and I also love basil so we used a lot. Finally, I only used 3 chicken breasts (I used the individually frozen kind) and since they were big I thought I would be OK. Two would have been plenty and there was plenty of stuff for 4 chicken breasts had I made that many. Again though, the sauce was awesome so I would have loved more of that.

Needless to say, a great start to Whip It Up. I don't think anything can compare to it though...

In the picture are also my zucchini that I made after watching the today show this morning. They too were good, but nothing compared to the chicken.